Obsidian笔记配合图床上传图片。目前选用的图床是Lsky-Pro。可以根据个人需要自行安装搭建。
插件源码: https://github.com/NekoTarou/lskypro-auto-upload
Obsidian插件库: https://github.com/obsidianmd/obsidian-releases
开发步骤
一、下载代码
git clone https://github.com/NekoTarou/lskypro-auto-upload
git checkout -b fea-new
具体开发过程不再描述,使用TS开发,Obsidian提供有一些库,多阅读操作手册,能少走不少弯路。
二、代码调试
npm install
npm run dev
打开Obsidian,可以在笔记本根路径 .obsidian\plugins 下创建一个硬链接,链接到项目文件夹中。然后可以把Obsidian当作浏览器来调试。
进入调试方法: Ctrl+Shift+i
Ctrl+P 搜索lskypro-auto-upload即可进入sourceMap
三、代码构建
npm run build
主要产物:main.js manifest.json
四、版本迭代
-
修改
package.json中的版本version -
修改
manifest.json中的版本version -
新增tag
git tag 1.0.X
- 推送tag
git push origin 1.0.X
推送tag之后,Github会自动构建产物。
关于自动构建说明:Github的Actions中有丰富的workflows,可配置相应的自动构建动作。
调试方法
PC端
PC端参考开发中的【二、代码调试】
移动端
一、手机连上电脑,打开开发者模式
设置-->关于手机,连续点击版本,输入密码打开开发者模式
系统和更新-->开发人员选项,打开USB调试(USB配置不能选择仅充电,否则调试模式打开后会自动关闭)
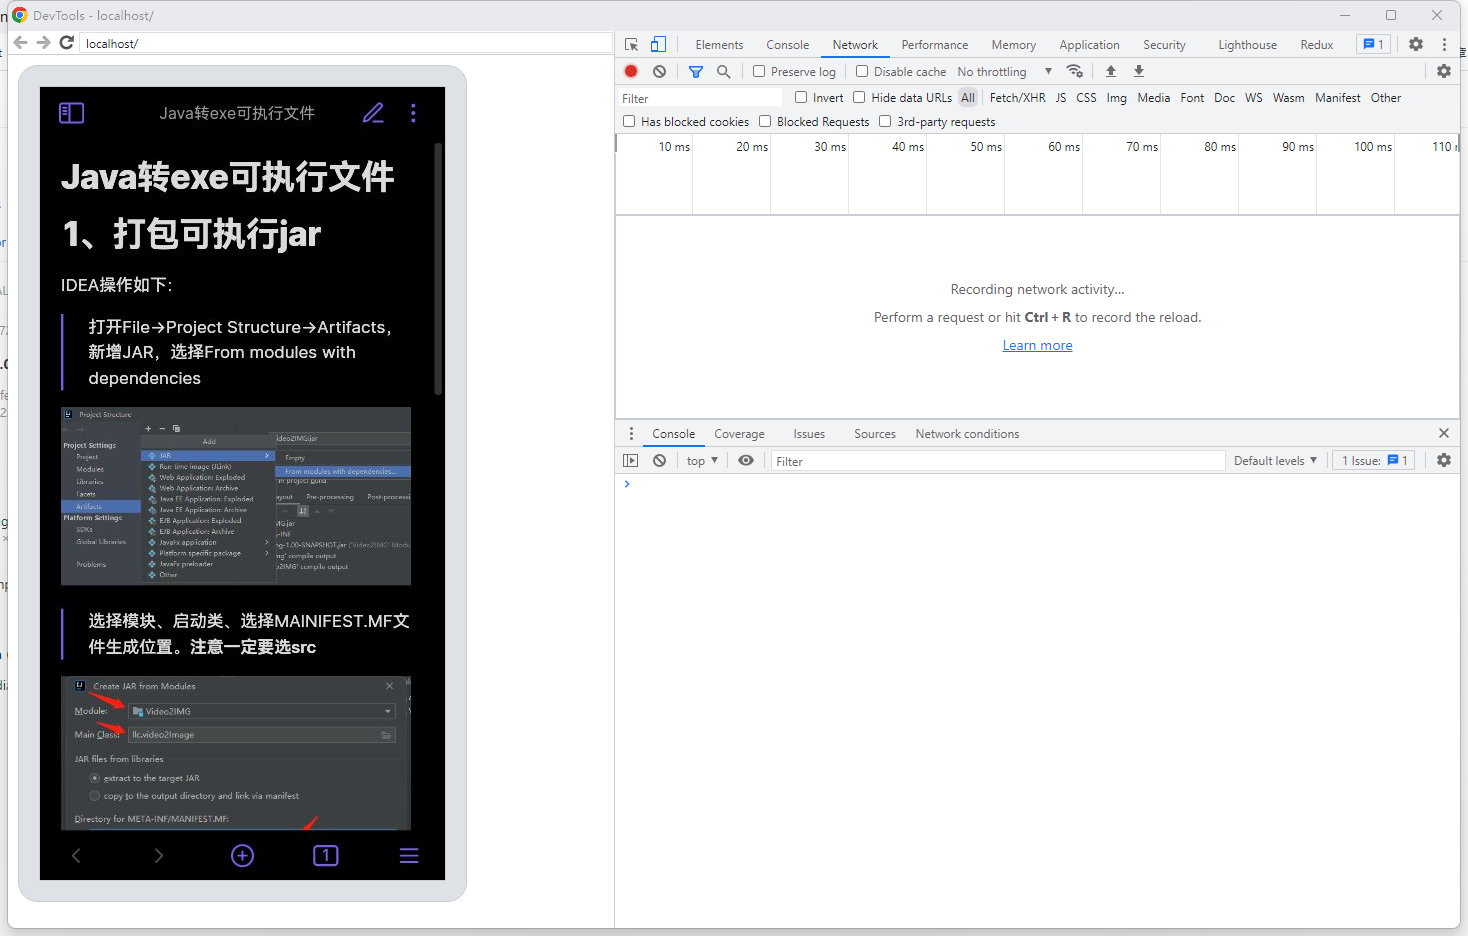
二、打开谷歌浏览器,输入 chrome://inspect
三、进入应用
连上手机之后,弹窗确认。然后切换到Obsidian应用,电脑端找到对应的进程之后,点击inspect

之后即可调试
发布步骤
插件开发完成之后可以发布到官方仓库,供其他人下载安装。开发前可以查看官方仓库中的说明:
To add your theme to our theme store, make a pull request to the community-css-theme.json file. Please add your theme to the end of the list.
name: a unique name for your theme. Must not collide with other themes.author: the author's name for display.repo: the GitHub repository identifier, in the form ofuser-name/repo-name, if your GitHub repo is located athttps://github.com/user-name/repo-name.screenshot: path to the screenshot of your theme.modes: if your theme supports both dark and light mode, put["dark", "light"]. Otherwise, put["dark"]if your theme only supports dark mode, or["light"]if your theme only supports light mode.publish: if your theme supports Obsidian Publish, set this totrue. Omit it otherwise.
发布步骤如下
1、插件代码提交到Github
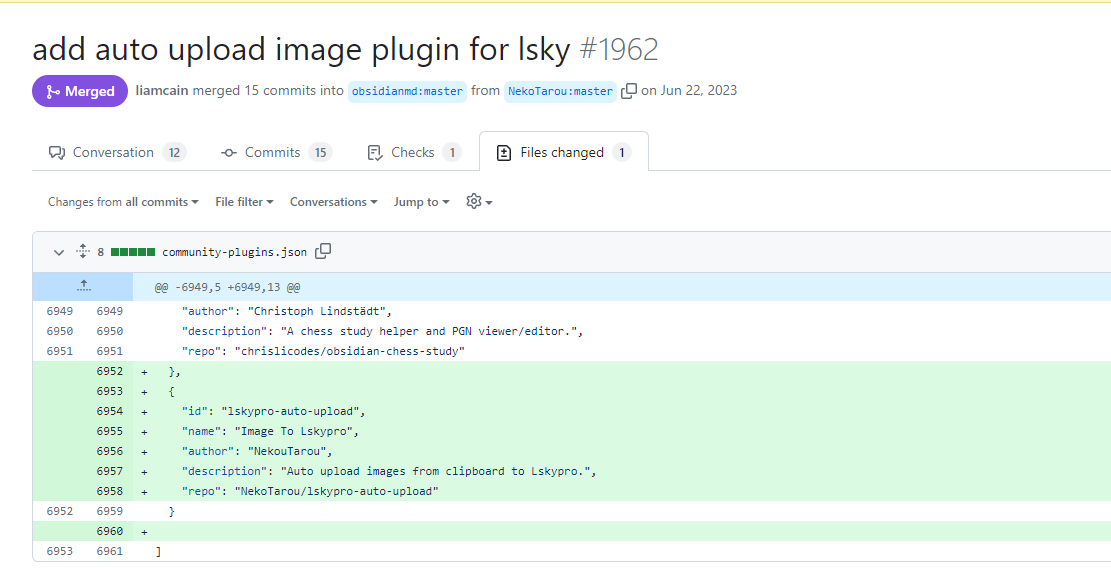
2、将官方仓库fork到个人仓库中,并根据官方要求修改community-plugins.json文件,将自己开发的插件信息添加到最后。
  {
    "id": "lskypro-auto-upload",
    "name": "Image To Lskypro",
    "author": "NekouTarou",
    "description": "Auto upload images from clipboard to Lskypro.",
    "repo": "NekoTarou/lskypro-auto-upload"
  }
3、到官方仓库中创建一个新的pull request,选择将个人仓库中的代码合并到官方仓库
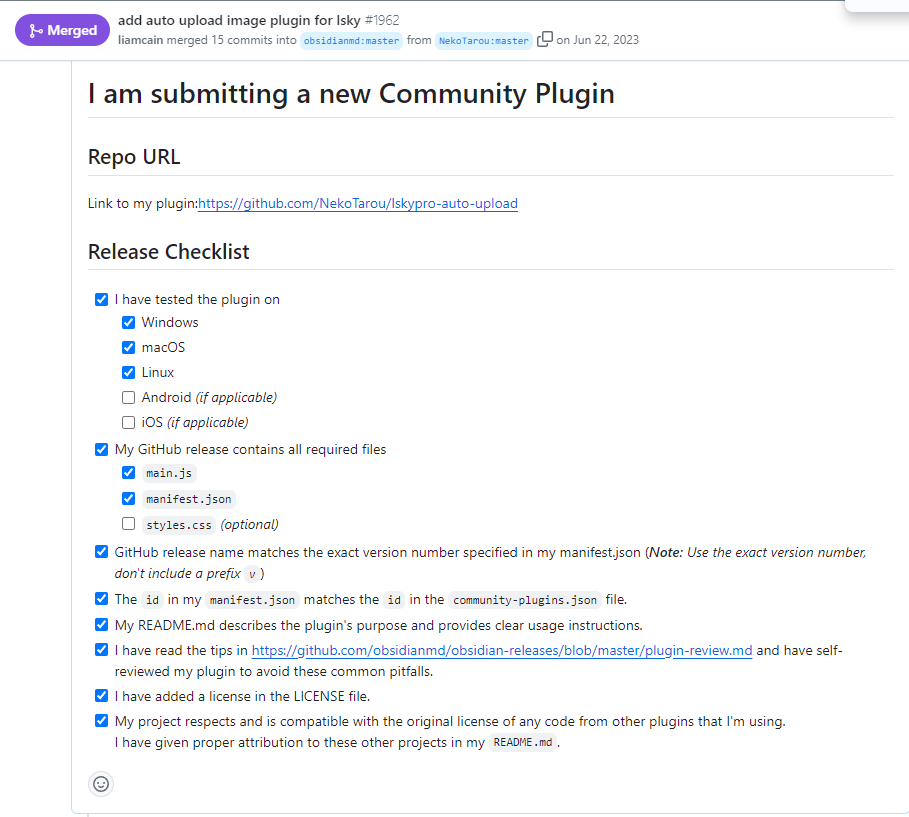
4、按照官方提供的模板填写pull request描述
I am submitting a new Community Plugin
Repo URL
Link to my plugin:
Release Checklist
- I have tested the plugin on
- Windows
- macOS
- Linux
- Android (if applicable)
- iOS (if applicable)
- My GitHub release contains all required files
-
main.js -
manifest.json -
styles.css(optional)
-
- GitHub release name matches the exact version number specified in my manifest.json (Note: Use the exact version number, don't include a prefix
v) - The
idin mymanifest.jsonmatches theidin thecommunity-plugins.jsonfile. - My README.md describes the plugin's purpose and provides clear usage instructions.
- I have read the developer policies at https://docs.obsidian.md/Developer+policies, and have assessed my plugins's adherence to these policies.
- I have read the tips in https://docs.obsidian.md/Plugins/Releasing/Plugin+guidelines and have self-reviewed my plugin to avoid these common pitfalls.
- I have added a license in the LICENSE file.
- My project respects and is compatible with the original license of any code from other plugins that I'm using.
I have given proper attribution to these other projects in myREADME.md.
我当时提交的填写信息如下图
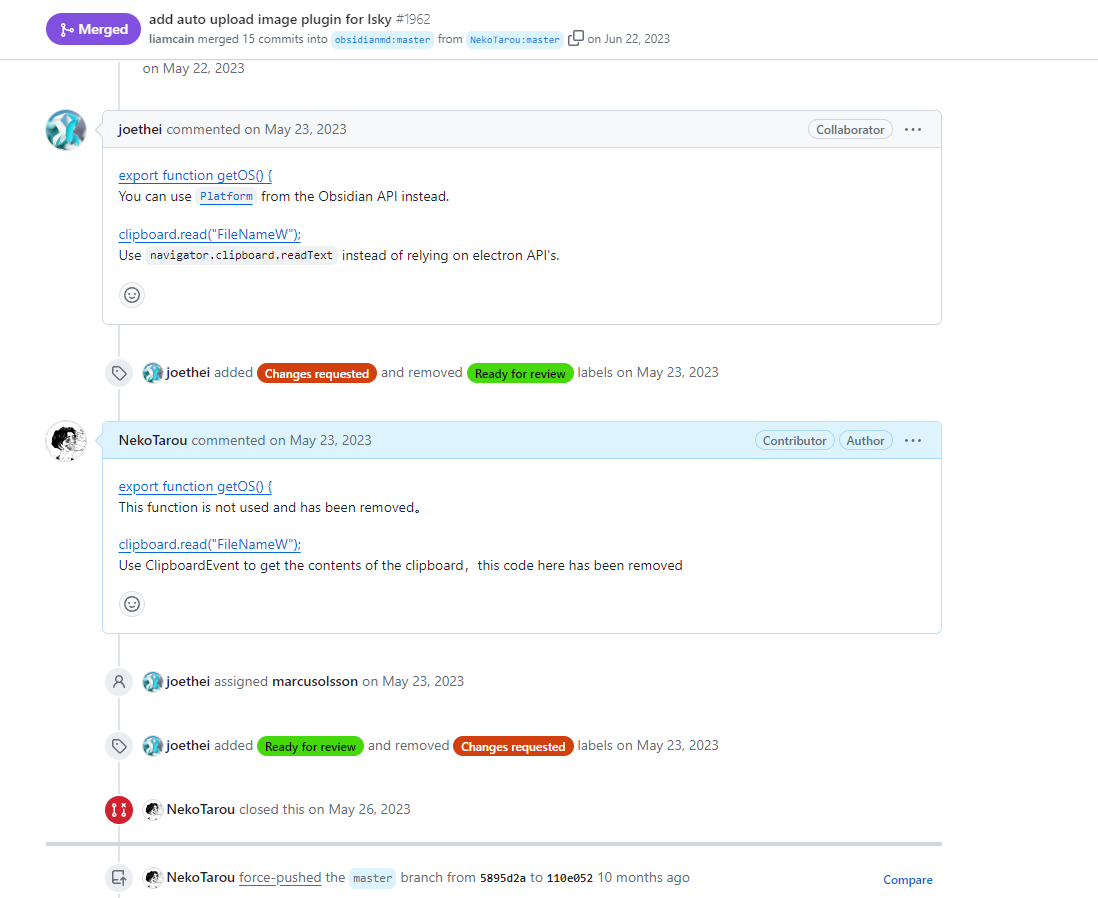
5、耐心等待请求合并通过,记得随时查看,因为大家都修改同一个文件,经常会出现文件冲突要求你重新修改之后再合并,有什么问题可以直接在请求下沟通。
下图是请求通过之后在仓库中见到的样子
祝各位顺利!